Recessed Lighting Layout
How many recessed lights a room takes and how far apart to mark them — with the lumens each fixture has to produce, not just the fixture count.
The spacing rule for recessed cans is ceiling height divided by two. A 9 ft ceiling gives 4.5 ft between fixtures; a 12 ft ceiling gives 6.
It is not an optical calculation. It is the spacing that keeps the cones of light overlapping at table height with a typical 60° beam, and it holds well enough across the 8–12 ft ceilings houses actually have.
Round to whole fixtures, then mark off the real number
The rule gives 4.5 ft. Rounding a 12 ft room to three fixtures makes the real spacing 4 ft. Mark the ceiling off the real number, not off the rule — the two are never the same, and the difference is visible in a straight run.
The first row sits half a spacing from the wall. Closer and you get a bright band down the wall; further and the corners go dark.
Lumens per fixture is the number to shop by
Layout calculators stop at the fixture count. That is the easy half. The useful output is how many lumens each can has to produce, because that is what you are choosing between on the shelf.
A 4″ LED downlight typically runs 600–800 lumens. A 6″ runs 800–1,200. If the calculation asks for 1,800 per fixture, the answer is not a brighter can — it is more of them.
Recessed light alone makes a room look flat
Downlights put everything in a vertical wash and leave the walls dark, which reads as institutional. The fix is not more cans. It is lamps, wall light and something at eye level.
Find the joists before you cut
A grid rarely lands clear of framing on the first attempt, and moving a can six inches to miss a joist is invisible once the trim is on. Cutting first and discovering the joist second is not.
Should the room have downlights at all
Worth asking before the spacing, because the answer is sometimes no.
Recessed lighting lights horizontal surfaces well and vertical ones badly. That suits a kitchen, a bathroom, a hallway and a utility room, where what you care about is the floor and the worktop.
It suits a living room or a bedroom much less. Those rooms are judged on faces and on walls, and a grid of downlights leaves both underlit while putting a hard shadow under everyone's brow. Rooms that look good with downlights in them almost always have something else doing the visible work — lamps, wall lights, something at eye level.
The honest summary: downlights are excellent general lighting and poor room lighting. In a kitchen that is the whole job. In a living room it is about a third of it.
The decision sequence
Getting these in the wrong order is what causes the expensive changes. This is the order that does not double back.
1. Decide the fitting type and diameter — this sets the beam angle, which sets the spacing. 2. Check the ceiling construction — joist direction and depth, insulation, whether it is a fire-separating ceiling. 3. Work out the grid from ceiling height, then adjust it to clear joists. 4. Position the task fittings, which sit over worktops and ignore the grid. 5. Work out total lumens for the room, then divide by the fitting count. 6. Decide the switching and dimming — which fittings are on which circuit. 7. Mark out and check the whole layout before cutting anything.
Steps 1 and 2 come first because both can rule out a fitting entirely. A non-IC-rated housing in an insulated ceiling, or a 6 in housing in a 4 in joist void, are discoveries you want before the order is placed.
Integrated LED or a replaceable lamp
The buying decision nobody flags at the point of sale, and it decides what happens in five years.
Integrated fittings have the LED bonded to the housing. They are slimmer, often cheaper, usually better thermally, and available in very shallow depths that suit tight joist voids. When the LED or its driver fails, the whole fitting is replaced — which means cutting, sometimes to a different hole size, and matching the appearance of the rest of the row.
Lamp-based fittings — usually GU10 — take a standard bulb. The fitting outlives several lamps, colour temperature and CRI can be changed later by swapping bulbs, and a failure costs the price of a bulb. They are deeper and usually slightly less efficient.
| Integrated | GU10 | |
|---|---|---|
| Depth needed | 25–50 mm | 80–120 mm |
| Cost of a failure | Whole fitting, plus cutting | One bulb |
| Change colour temperature later | No | Yes |
| Upgrade CRI later | No | Yes |
| Availability of a match in 5 years | Uncertain | Standard fitting |
For a ceiling you expect to keep, GU10 is the more forgiving choice, and the ability to raise the CRI later without touching the ceiling is worth more than it sounds. Integrated wins where depth is genuinely tight.
Buy two spare fittings either way, at the same time as the rest. Model ranges turn over quickly, and a single replacement three years later rarely matches the row it sits in.
Fixed, gimbal or wall-wash
Three trims, and choosing by appearance rather than by job is a common mistake.
Fixed aims straight down. Correct for the general grid.
Gimbal or adjustable tilts, usually up to about 30°. Use over artwork, on sloped ceilings, and anywhere the light needs to reach a vertical surface.
Wall-wash has an asymmetric reflector that throws light sideways. Sits closer to the wall than the standard offset and produces an even graded wash rather than a row of scalloped arcs.
Mixing them in one ceiling is normal and looks fine, because the trims are nearly identical from below. What does not look fine is a row of fixed downlights aimed at a bookcase they cannot reach.
3 articles
How many recessed lights for a 18 × 18 ft bathroom?
| Layoutacross the 18 ft dimension × along the 18 ft dimension | 4 × 4 |
|---|---|
| Spacing (rule of thumb)half of the 10 ft ceiling | 5ft |
| Actual spacing to mark outafter rounding to whole fixtures | 4.5 × 4.5ft |
| First light from the wallhalf a spacing — closer washes the wall, further leaves dark corners | 2.3 × 2.3ft |
| Room area | 324ft² |
| Target light levelgeneral light — the mirror needs light from the sides, not above | 30fc |
| Total lumens needed | 9,720lm |
| Lumens per fixtureabout 8 W each in LED | 608lm |
Notes
- The spacing rule is ceiling height ÷ 2, which gives 5 ft here. Rounding to whole fixtures moves it to 4.5 × 4.5 ft — mark the ceiling off the real numbers, not the rule.
- 608 lumens per can is the figure to shop by. A 4″ LED downlight typically runs 600–800 lm and a 6″ runs 800–1,200 lm, so either size covers it.
- Bathroom is a task space. 30 fc is the general level — countertops, desks and mirrors still need their own light. Ceiling cans alone put the light behind you and your own shadow onto the work.
- Put them on a dimmer. It costs almost nothing at install, and it is the difference between a ceiling that works at dinner and one that works at 11pm.
- Check the joists before marking. A 4 × 4 grid rarely lands clear of framing on the first try, and moving a can 6 inches to miss a joist is invisible once the trim is on.
Recessed lighting layout
624 calculations · browse all
- How many recessed lights for a 8 × 8 ft living room?
- How many recessed lights for a 8 × 10 ft dining room?
- How many recessed lights for a 8 × 14 ft bedroom?
- How many recessed lights for a 8 × 16 ft garage?
- How many recessed lights for a 8 × 20 ft home office?
- How many recessed lights for a 8 × 24 ft kitchen?
- How many recessed lights for a 8 × 26 ft basement?
- How many recessed lights for a 8 × 30 ft bathroom?
- How many recessed lights for a 10 × 12 ft living room?
- How many recessed lights for a 10 × 14 ft dining room?
- How many recessed lights for a 10 × 18 ft bedroom?
- How many recessed lights for a 10 × 20 ft garage?
- How many recessed lights for a 10 × 24 ft home office?
- How many recessed lights for a 10 × 28 ft kitchen?
- How many recessed lights for a 10 × 30 ft basement?
- How many recessed lights for a 12 × 14 ft bathroom?
- How many recessed lights for a 12 × 18 ft living room?
- How many recessed lights for a 12 × 20 ft dining room?
- How many recessed lights for a 12 × 24 ft bedroom?
- How many recessed lights for a 12 × 26 ft garage?
- How many recessed lights for a 12 × 30 ft home office?
- How many recessed lights for a 14 × 16 ft kitchen?
- How many recessed lights for a 14 × 18 ft basement?
- How many recessed lights for a 14 × 22 ft bathroom?
- How many recessed lights for a 14 × 26 ft living room?
- How many recessed lights for a 14 × 28 ft dining room?
- How many recessed lights for a 16 × 16 ft bedroom?
- How many recessed lights for a 16 × 18 ft garage?
- How many recessed lights for a 16 × 22 ft home office?
- How many recessed lights for a 16 × 26 ft kitchen?
- How many recessed lights for a 16 × 28 ft basement?
- How many recessed lights for a 18 × 18 ft bathroom?
- How many recessed lights for a 18 × 22 ft living room?
- How many recessed lights for a 18 × 24 ft dining room?
- How many recessed lights for a 18 × 28 ft bedroom?
- How many recessed lights for a 18 × 30 ft garage?
- How many recessed lights for a 20 × 22 ft home office?
- How many recessed lights for a 20 × 26 ft kitchen?
- How many recessed lights for a 20 × 28 ft basement?
- How many recessed lights for a 22 × 22 ft bathroom?
- How many recessed lights for a 22 × 26 ft living room?
- How many recessed lights for a 22 × 28 ft dining room?
- How many recessed lights for a 24 × 24 ft bedroom?
- How many recessed lights for a 24 × 26 ft garage?
- How many recessed lights for a 24 × 30 ft home office?
- How many recessed lights for a 26 × 28 ft kitchen?
- How many recessed lights for a 26 × 30 ft basement?
- How many recessed lights for a 28 × 30 ft bathroom?
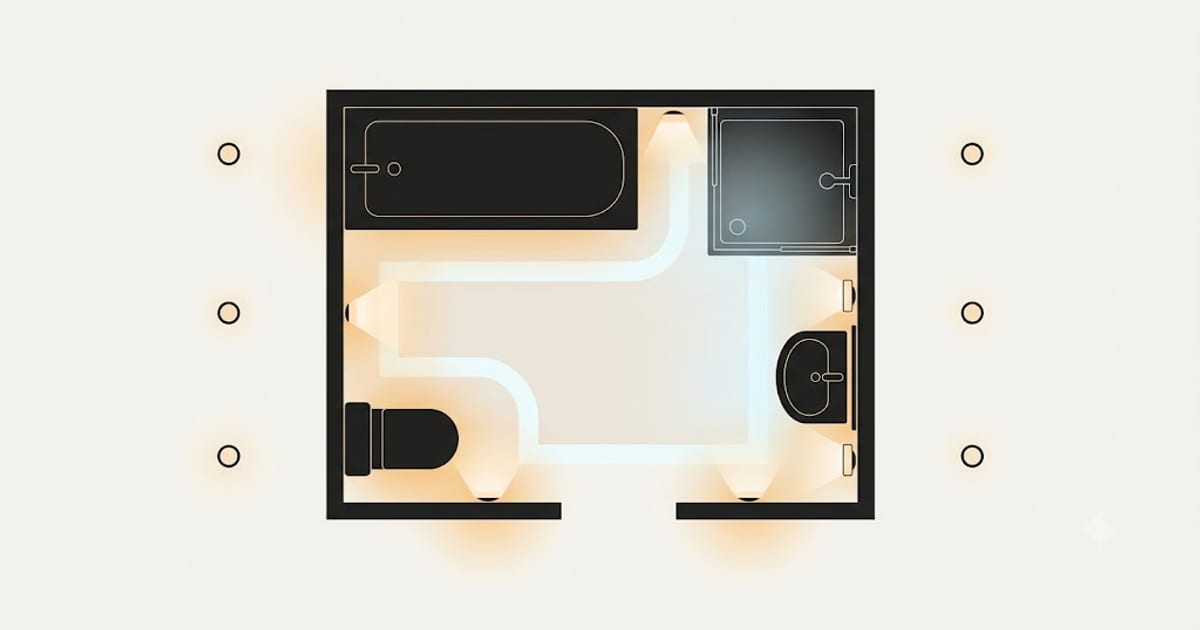 Downlights in a Bathroom: How Many, and the Zone That Decides the Rating
Reflective surfaces mean a bathroom needs less light than the arithmetic suggests, and the one place downlights cannot serve is the mirror.
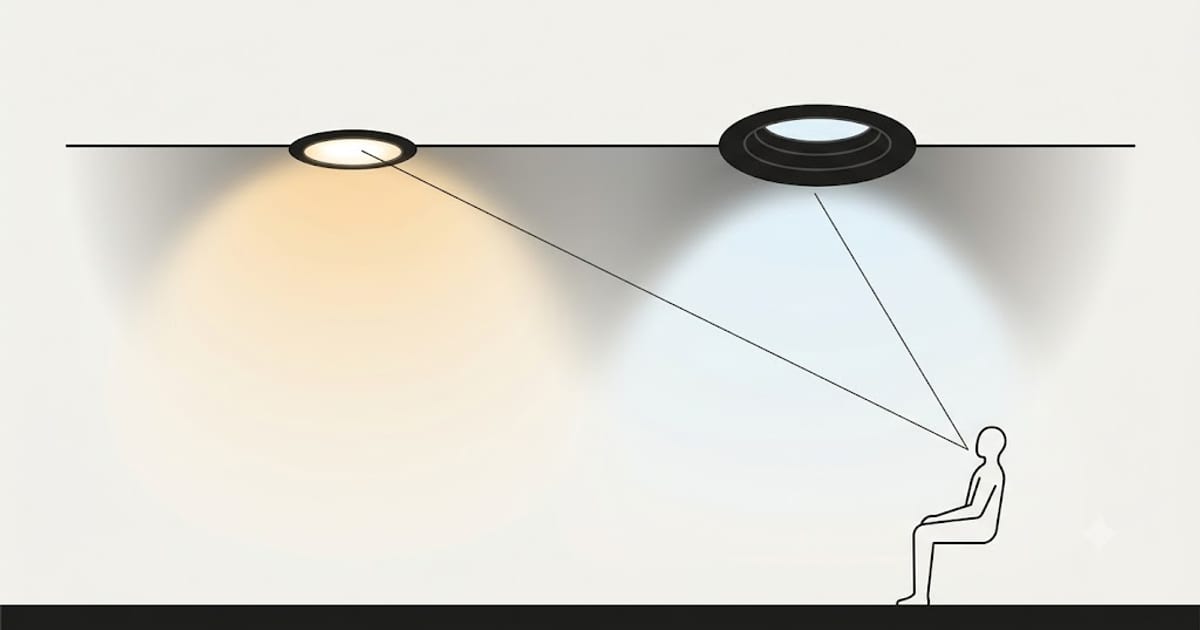 Why Downlights Are Uncomfortable to Sit Under, and What Fixes It
The problem is not how much light there is. It is that a very small, very bright object is sitting in your field of view every time you look up.
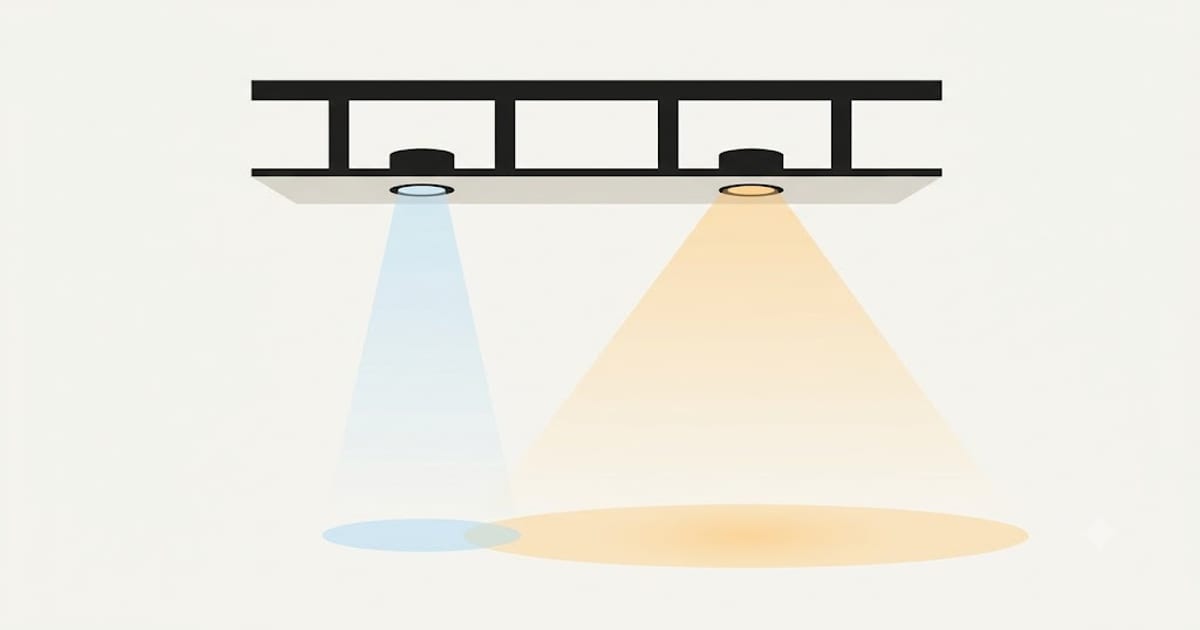 Replacing Halogen Downlights With LED: The Four Things That Change
The lamp fits and the ceiling looks the same. Beam angle, the dimmer and the transformer all changed underneath, and each one has its own failure.