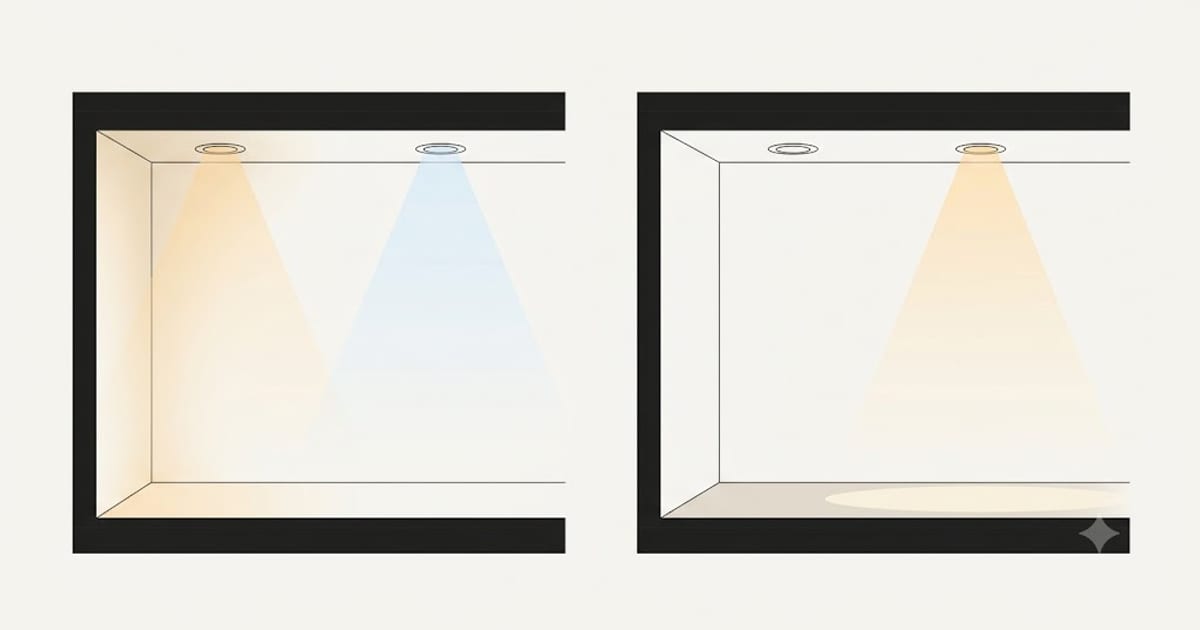
Half the spacing between fittings. With 4 ft spacing on an 8 ft ceiling, that is 2 ft from the wall. On a 10 ft ceiling with 5 ft spacing, it is 2.5 ft.
That is the rule. The reason behind it is what tells you when to break it.
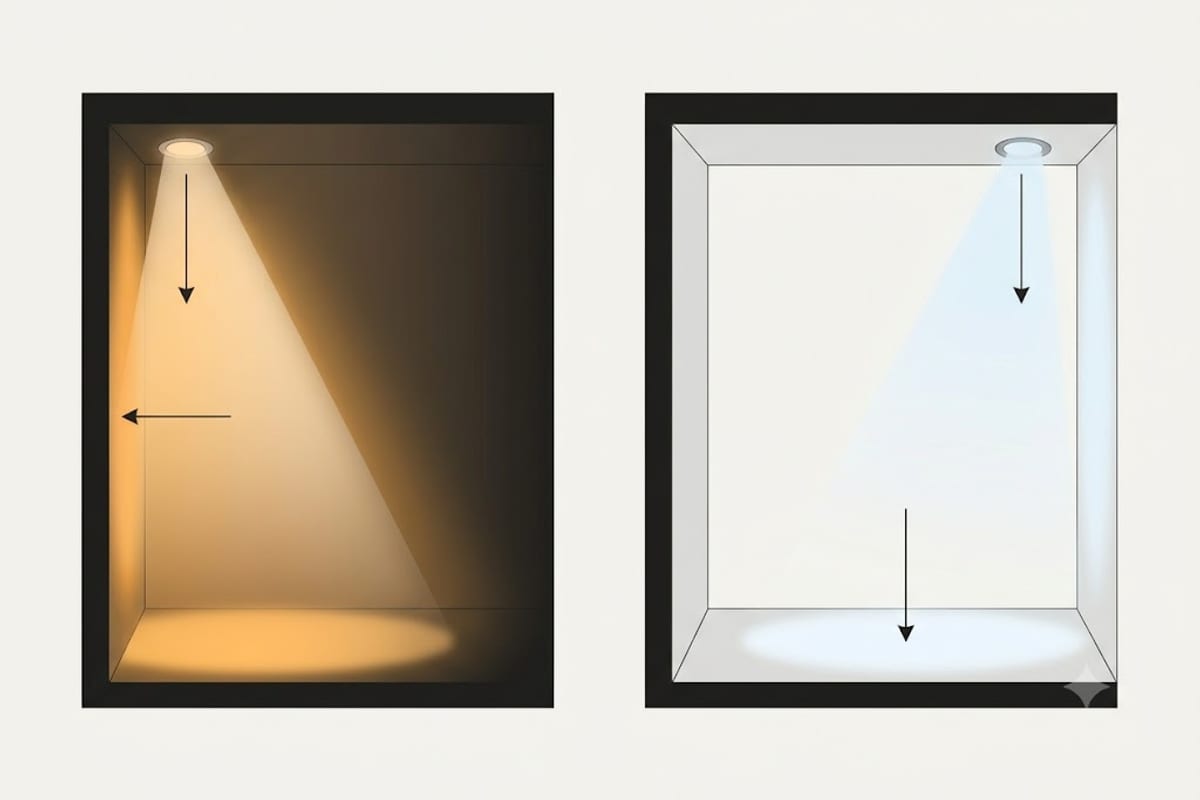
The walls are what make a room look bright
People judge how bright a room is mostly by its vertical surfaces, not its floor. Walls occupy far more of your field of view than the floor does, and a lit wall bounces light back into the space.
Put the outer fittings 2 ft from the wall and the edge of each cone falls on the wall itself, washing it from top to bottom. Push them out to 4 or 5 ft and every cone lands on the floor. The walls go dark, the room reads as gloomy, and the usual response — adding more fittings in the middle — makes the ceiling spottier without fixing anything.
Why half the spacing, specifically
A fitting in the middle of the grid lights the area around it in every direction, sharing each side with a neighbour. A fitting at the edge has a neighbour on one side and a wall on the other, so it only has to cover half as much distance outward.
Half the spacing puts every point on the ceiling the same distance from a light source — which is what makes the light even rather than banded.
| Ceiling | Spacing | From wall |
|---|---|---|
| 8 ft | 4 ft | 2 ft |
| 9 ft | 4.5 ft | 2.25 ft |
| 10 ft | 5 ft | 2.5 ft |
| 12 ft | 6 ft | 3 ft |
When to move them closer
Tall cabinets, bookcases or a fireplace on that wall. Go to 12–18 inches so the light falls down the face of the cabinetry rather than onto the floor in front of it. Any closer and the top of the unit casts a hard shadow.
Artwork you want lit. Around 18–24 inches for a standard ceiling, and use an adjustable or gimbal fitting aimed at the centre of the piece.
Deliberate wall washing. Some fittings are designed for it, with an asymmetric beam that throws light sideways. These sit 12–18 inches out and produce an even graded wash rather than a scalloped arc.
When to move them further
A sloped ceiling. Measure the offset from the wall the fitting is near, and check the beam is not aimed into the slope.
A wall with nothing on it, in a room where floor light matters more — a workshop or a garage. Even then, do not exceed the spacing itself.
The mistake that produces scallops
Standard downlights near a wall produce arcs on the wall — bright at the top, fading downward, curved at the edges. Space them at the grid interval and those arcs read as a rhythmic pattern, which looks deliberate.
Space them irregularly and it looks like an error. This is why the wall offset should be the same on every wall in a room even when that means the middle spacing is slightly uneven. Your eye reads the edges as a border; it does not audit the middle.
What about the corners
Corner fittings sit at the offset distance from both walls — 2 ft in and 2 ft across on an 8 ft ceiling. Do not aim a fitting into the corner itself. Corners are naturally darker and trying to fix that with a dedicated downlight produces a hot spot rather than an evenly lit corner.
If a dark corner genuinely bothers you, a floor lamp or an uplighter does the job far better, because it lights the corner from below and behind rather than from directly above.
Working out the full layout
The offset is one half of a layout. The other half is the spacing itself and how many fittings the room takes, both covered in recessed light spacing and worked through for a square room in how many recessed lights in a 12×12.
For total output across the whole grid, the room lighting calculator gives the lumens and divides them across the fittings.
Corridors and narrow rooms
A hallway is too narrow for a grid, so the offset rule has to work differently: in a corridor, the fittings run down the centre line and the offset that matters is the one at each end.
Down the length, keep the standard spacing — ceiling height ÷ 2 — and set the first and last fitting at half that from the end walls. A hallway with an 8 ft ceiling takes fittings every 4 ft, starting 2 ft from the door.
Across the width, a corridor under about 4 ft wide takes a single central row. Between 4 and 7 ft, a single row still works and looks calmer than two. Above 7 ft it is a room, not a corridor.
The one thing worth doing differently: in a hallway with doors along one side, do not centre the fittings between the doors — align them so nothing sits directly above a door architrave, where the light rakes down the door face and exaggerates every imperfection in it.
Do not light the curtains
A wall with a window in it behaves differently from a solid wall, and the standard offset can make it look worse rather than better.
At 2 ft from the wall, a downlight above a curtained window throws its light straight down the face of the curtain. Two things follow. The curtain becomes the brightest object in the room, pulling the eye to it. And every fold, crease and hanging fault is lit from directly above at a raking angle, which is the single most unflattering direction for fabric.
Two fixes, depending on the room.
Move the row inward to around 3–4 ft on that wall only. The wall above the window still catches some light, the curtain does not.
Or commit to it, with a proper curtain wash: fittings at 8–12 inches from the wall, evenly spaced along the whole run, with a wide beam. Deliberate and even reads as a design decision; one downlight half-lighting one curtain does not.
The same reasoning applies to a wall with a large mirror. A downlight at standard offset above a mirror lights the top of the frame and puts a bright reflected disc in the mirror at exactly eye height.
Marking out on the ceiling
The arithmetic gives you positions. Getting them onto a real ceiling accurately is where a good layout goes wrong, and it takes ten minutes to do properly.
Snap the offset lines first. A chalk line at the offset distance from each of the four walls gives you the border rectangle that the outer fittings sit on. Every fitting position is on or inside that rectangle.
Measure fitting positions along those lines, from the corners inward — never cumulatively from one end. Measuring each position from the previous one accumulates error, and by the ninth fitting the grid is visibly out.
Mark the centre, then check the whole set before cutting anything. Stand at the door and look along each row. The eye catches a misaligned fitting from ten feet away far faster than a tape measure catches it on a ladder.
Cut one hole and look up. It costs two minutes and it is the last cheap moment to discover a joist, a pipe, or a cable run you did not expect.
When the walls are not square
Older houses rarely have four right angles, and a grid laid out from the wrong reference looks worse than no grid at all.
The rule is that the eye reads the border, not the middle. So lay the grid out parallel to the longest wall you can see from the main doorway, and let the error accumulate against the wall you see least — usually the one you are standing in front of when you enter.
If two adjacent walls both matter visually, split the difference: keep the outer row parallel to each wall it faces, and absorb the discrepancy in the middle spacing, which nobody audits.
A room that is 3 inches out of square over 12 ft will look perfect handled this way and obviously wrong if the grid is laid out from a diagonal.