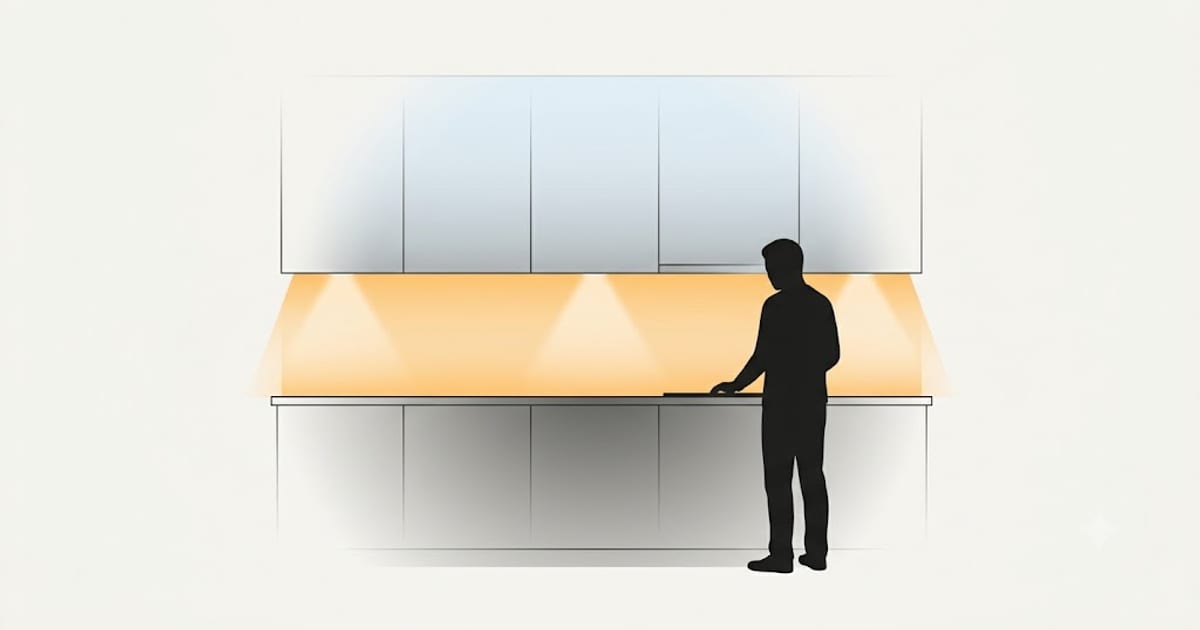
A kitchen is the only room in the house where the lighting brief genuinely has two answers, and where the obvious solution — a brighter ceiling light — makes one of them worse rather than better.
The general method is in how many lumens a room needs.
The two numbers
General lighting: 30–40 lumens per square foot across the whole floor area. This is so you can move around, find things, and see into the room.
Worktop lighting: 50–100 lumens per square foot across the counter surface only.
By kitchen size:
| Kitchen | General light | Worktop (about 20 % of area) |
|---|---|---|
| 80 sq ft | 2,400–3,200 lm | 800–1,600 lm |
| 100 sq ft | 3,000–4,000 lm | 1,000–2,000 lm |
| 120 sq ft | 3,600–4,800 lm | 1,200–2,400 lm |
| 150 sq ft | 4,500–6,000 lm | 1,500–3,000 lm |
| 180 sq ft | 5,400–7,200 lm | 1,800–3,600 lm |
| 200 sq ft | 6,000–8,000 lm | 2,000–4,000 lm |
The two are additive. A 150 sq ft kitchen wants somewhere around 6,000–9,000 lumens in total, split between the two jobs.
Why the ceiling cannot do the worktop
The counter runs along the wall. The wall cabinets are above it. You stand at the counter facing the wall — which puts your body between the ceiling light and the surface you are working on.
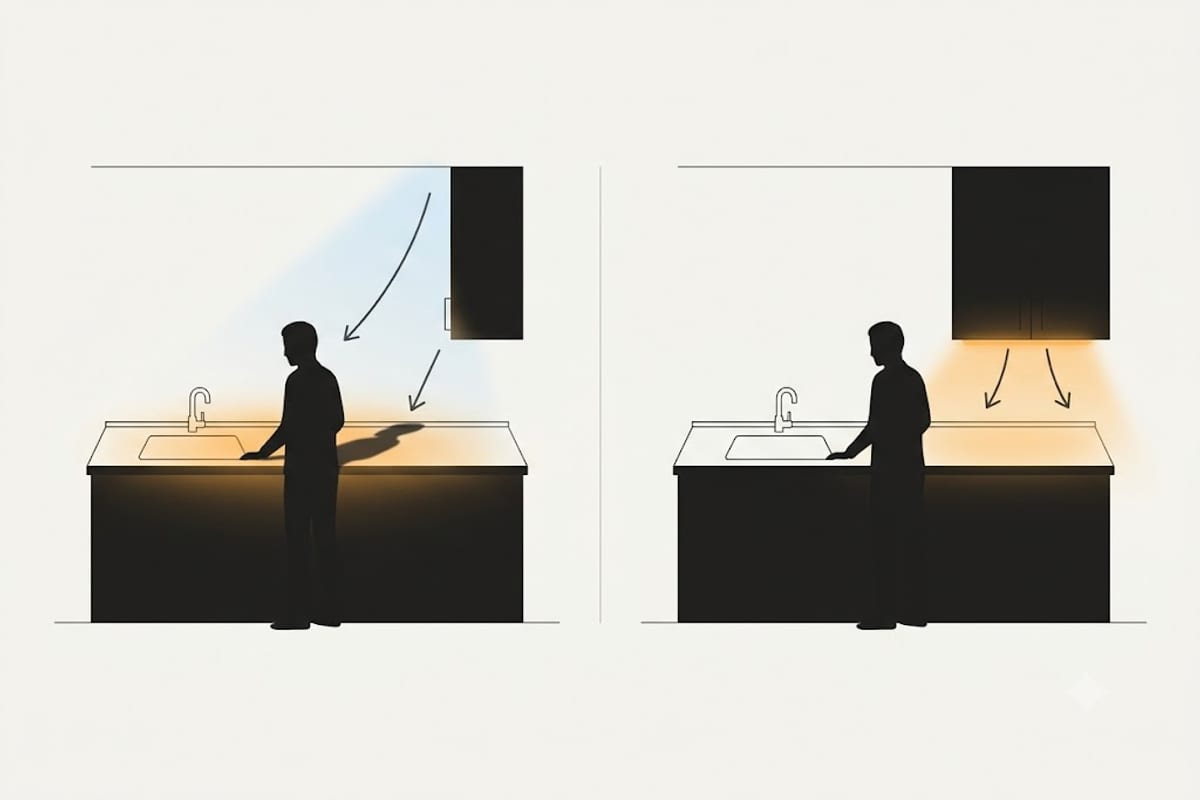
Make the ceiling light brighter and the shadow gets sharper, not weaker. You end up with a bright room and a dark chopping board, and everything else uncomfortably glary.
The geometry only works if the light comes from in front of you, which in a kitchen means from underneath the wall cabinets. Under-cabinet lighting is not a decorative extra; it is the only fitting position that solves the actual problem.
Where there are no wall cabinets — an island, a run under a window — the equivalent is a pendant or a directional fitting positioned so the light arrives at the surface from the room side rather than from directly overhead.
Under-cabinet, practically
Output: roughly 200–300 lumens per linear foot of counter. A 10-foot run wants 2,000–3,000 lumens across it.
Position matters more than output. Mount the fitting toward the front edge of the cabinet underside, not against the wall. Mounted at the back, the light hits the splashback and reflects glare into your eyes; mounted forward, it washes the counter evenly.
Continuous beats spots. A strip or a long linear fitting gives even light along the whole run. Individual pucks give bright circles with dim gaps, and the gaps are always where you are working.
Switch it separately. Under-cabinet light on its own is a pleasant low-level kitchen at night, and it is the setting most people end up using most.
Islands
An island has no cabinet to hide a fitting under, so pendants do the job.
- Height: hang so the bottom of the shade sits roughly 30–36 inches above the counter surface. Higher spreads more but glares; lower is focused but blocks sightlines across the room.
- Number and spacing: two or three over a typical island, spaced evenly with the outer ones set in from the ends rather than at them.
- Shade shape decides everything. An open-bottomed shade puts light on the counter. A diffusing globe lights the room and does comparatively little for the surface. Choose by which job you want it to do.
General lighting layout
For the ambient layer, recessed downlights are the usual answer. Two rules that matter more than the fitting choice:
- Space them at roughly the ceiling height. An 8-foot ceiling wants lights about 4 feet apart in a grid — spacing equal to about half the ceiling height is a common starting point, adjusted for the beam angle of the fitting.
- Keep them off the wall by about half the spacing, and — importantly — position the row over the counter so it sits in front of the cabinet face rather than directly above it. A downlight centred over the cabinet lights the cabinet doors.
Colour temperature, briefly
Kitchens are the room where the warm-versus-cool argument is sharpest, because the room is both a workspace and a living space.
3000 K is the common compromise: warm enough to feel domestic, cool enough that food colours read accurately. 2700 K is cosier and makes greens and whites look slightly duller. 4000 K is crisper for task work and can feel clinical in a kitchen that opens onto a living area.
Whatever you choose, use the same temperature for the general and the under-cabinet layers. Mixing them is the single most common kitchen lighting mistake and it looks wrong immediately.
What this page does not cover
- The general method is in how many lumens a room needs, including the ceiling height and surface colour corrections.
- Dimming and LED compatibility, which matter because a kitchen wants a bright setting and an evening setting.
- Colour rendering, which affects how food looks and is not the same as colour temperature.
- Electrical work, which is a job for a qualified electrician wherever it involves new circuits.
Two numbers, and the second one has to come from in front of you.
The third layer nobody budgets for
General and worktop are the two numbers. There is a third that costs very little and is missing from most kitchens: light inside things.
Pantry and larder cupboards are deep, dark boxes with a person standing in the doorway blocking the room light. A strip inside on a door switch turns a cupboard you rummage in into one you can read. This is the single highest satisfaction-per-pound fitting in a kitchen.
Deep base units and corner carousels have the same problem in a worse form, because you are looking down into them from above with your own shadow directly below you.
Glass-fronted display cabinets are the decorative version, and they need much less than people fit — 100–200 lumens per cabinet, warm, diffused. Bright light in a glass cabinet turns it into a lightbox and hides what is inside it behind reflections.
Drawer lighting is available and is mostly a solution looking for a problem — a drawer is shallow and you are looking straight into it.
Budget roughly 300–600 lumens per interior, on door or motion switches so nothing is ever left on.
Hob and extractor lighting is usually inadequate
Cooker hoods almost always include lights, and the specification is almost always poor: two small lamps, often 20–40 lumens each, mounted flush in a metal underside a considerable distance above the hob.
That is an accent level, not a task level. A hob is the point in the kitchen where you most need to judge colour and doneness, and it is frequently the worst lit surface in the room.
Three fixes, in order of cost.
Replace the hood lamps. Most take a standard small format — GU10, G4 or a small E14 — and a modern high-CRI LED at 300–400 lumens transforms it for the price of two bulbs. Check the hood's maximum wattage and heat rating first; the space above a hob runs hot.
Add downlights in front of the hood, in the ceiling, positioned so the light reaches the front half of the hob where the hood does not. They will not help at the back but they cover the part you stand over.
Choose the hood on its lighting if it is being replaced anyway. Published lumen figures for hood lighting exist and vary by a factor of ten between models.
Aim for the same 50–100 lm/sq ft as any other work surface, and CRI 90+ — judging whether meat is cooked is exactly the task deep red rendering exists for.
Open-plan: where the kitchen ends
In an open-plan room the kitchen target is three to four times the living target, and putting both in one space needs a decision about where the boundary is.
Draw the boundary at a physical feature — an island, a change of floor finish, a beam line, the end of the run of units. A boundary that corresponds to something visible reads as deliberate; one drawn at an arbitrary point in the ceiling reads as a mistake.
Do not taper. A gradient of downlights getting sparser toward the living end looks like the electrician ran out. Keep the kitchen grid even up to the boundary and stop.
Change the fitting type across the boundary, not just the spacing. Recessed downlights over the kitchen and pendants, wall lights or lamps over the living area is a much clearer signal than the same downlights at wider spacing.
Keep colour temperature the same across the whole room. This is the one specification that must not change at the boundary — an open-plan room is a single sightline, and two colour temperatures in one sightline looks like a fault. If the kitchen finishes want 4000K and the living end wants 2700K, take 3000K for both and put the cooler light only under the cabinets, where the source is never in view.
Switch them separately, and dim both. The kitchen at full output while someone is watching television at the other end of the room is the most common complaint about open-plan lighting, and it is a wiring decision rather than a fitting one.
The switching plan
A kitchen with everything on one switch has one setting, and it is the wrong one most of the time. Four circuits cover every realistic use:
| Circuit | Used for |
|---|---|
| General ceiling grid, dimmed | Cooking, cleaning, daytime |
| Under-cabinet | Working at the counter, and low evening light on its own |
| Island or table pendants | Eating, and the room's evening character |
| Cabinet interiors, on door switches | Automatic, never switched by hand |
The one that surprises people is how much the under-cabinet circuit alone gets used — it is bright enough to make tea and find things by, dim enough not to wake a household, and it is the setting a kitchen spends most of its switched-on hours in.
Two switch positions matter: at the main door, and at the far end of a kitchen you walk through. Two-way switching on the general circuit is a small cost during first fix and impossible to add cheaply later.