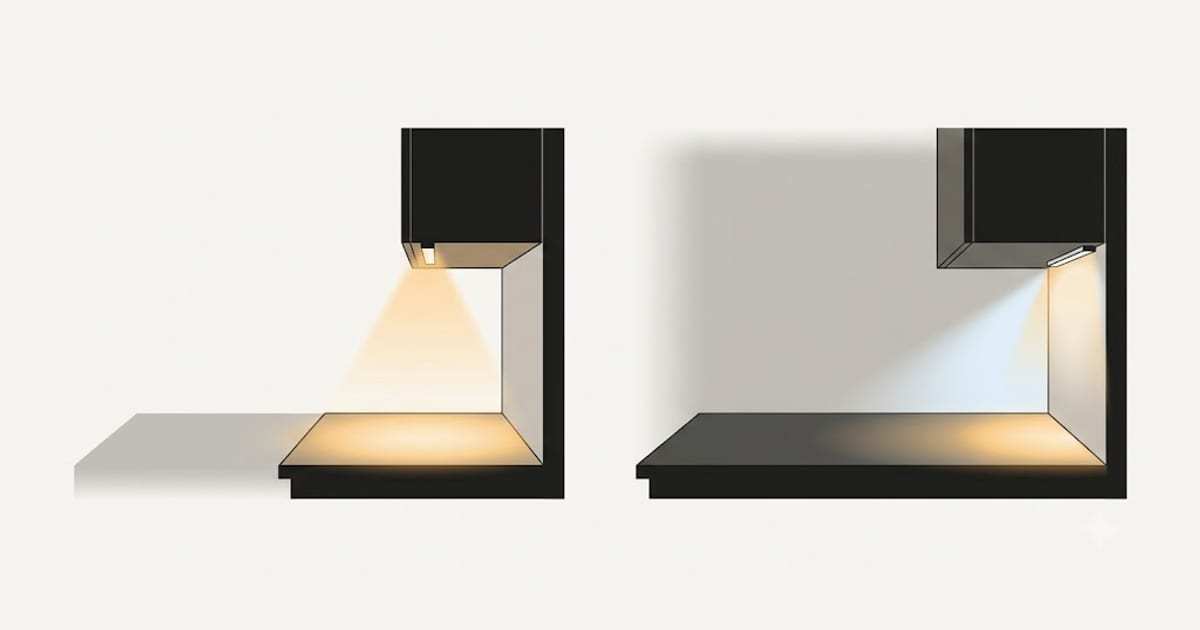
175–250 lumens per linear foot of worktop for task lighting. A 6 ft run of cabinets wants roughly 1,050–1,500 lumens in total.
Unlike room lighting, this is specified per foot rather than per square foot, because the surface is a strip rather than an area.
| Run length | Task lighting | Accent only |
|---|---|---|
| 3 ft | 525–750 lm | 180–300 lm |
| 4 ft | 700–1,000 lm | 240–400 lm |
| 6 ft | 1,050–1,500 lm | 360–600 lm |
| 8 ft | 1,400–2,000 lm | 480–800 lm |
| 10 ft | 1,750–2,500 lm | 600–1,000 lm |
The accent column is for a run that exists to make the kitchen look good at night rather than to chop vegetables under. Around a third of task level.
Position matters more than output
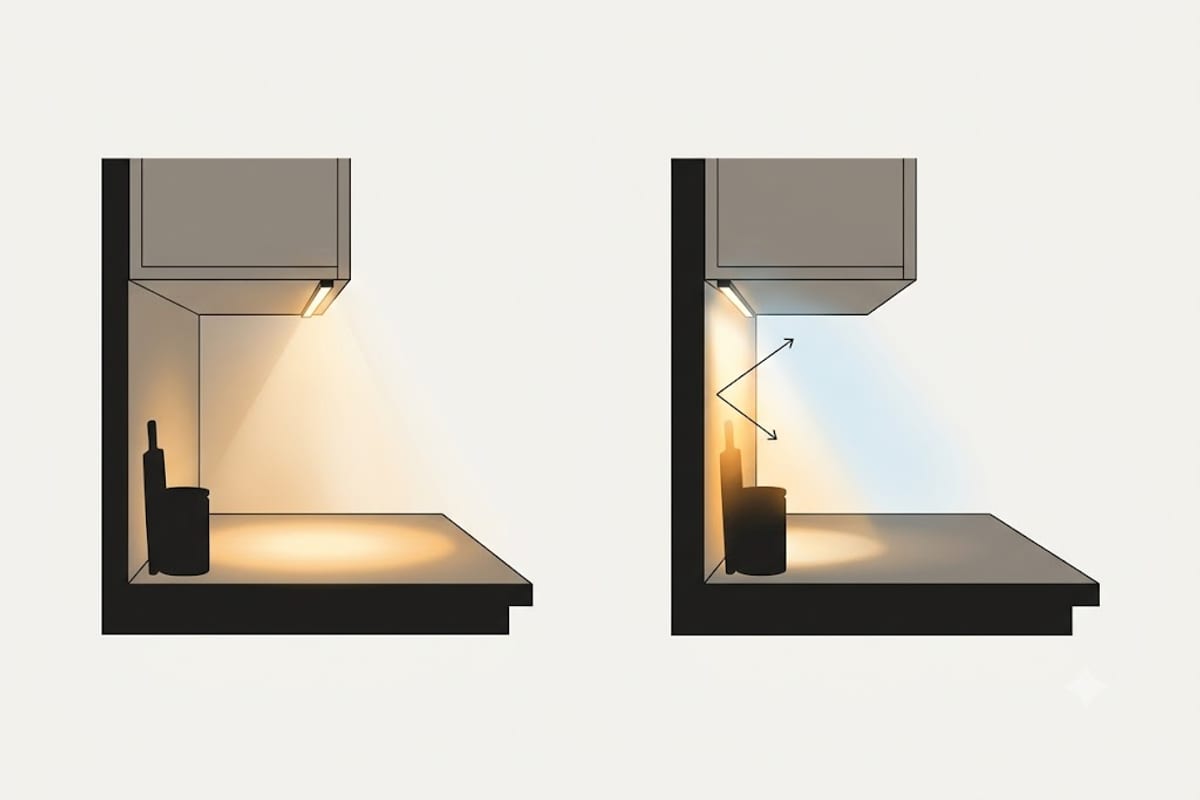
Mount the strip at the front edge of the cabinet underside, not at the back against the wall.
At the front, light falls across the whole depth of the worktop, and the cabinet itself hides the strip from anyone standing in the room.
At the back, three things go wrong at once: the front half of the worktop stays dim, light bounces off the vertical splashback into your eyes, and a glossy worktop shows a clear reflection of the strip.
If the cabinet has no lip to hide the fitting, use a channel with a diffuser. A bare strip of LEDs reflected in a polished granite worktop is a row of visible dots.
Continuous, not spotty
Use a continuous strip or a channel, not puck lights. Pucks put down a row of overlapping circles, and on a reflective worktop they produce a row of bright hot spots with dim gaps.
If pucks are already installed, spacing them at roughly 12 inches and fitting frosted lenses gets most of the way to a strip.
Colour temperature: cooler than the room
This is the one place in a kitchen where a cooler colour temperature belongs even if the room is warm.
Under-cabinet: 3500–4000K. Cooler light resolves detail and edge definition better, which matters when what you are looking at is a knife against a chopping board.
Room lighting: 2700–3000K if the kitchen has warm finishes.
Normally mixing colour temperatures within one sightline looks like a fault — but the exception is a source you never see directly. You look at the worktop, not the strip, so the room keeps its warm character while the work surface gets the crisper light. The reasoning is in 3000K or 4000K in a kitchen.
Colour rendering matters here
You are judging food under this light: whether meat is cooked through, whether a sauce has caught, whether the herbs are still good.
CRI 90 or above for under-cabinet lighting, and pay attention to R9 — the deep red value that most CRI 80 products score badly on and that food depends on more than any other colour. See what a good CRI is.
Wire it separately
Under-cabinet lighting on its own switch is worth the extra cable. It becomes the low-level evening light for the whole kitchen — enough to make tea by, not enough to wake anyone up — and that turns out to be the setting it spends most of its life on.
Put it on a dimmer as well if you can. Low-voltage LED strip and mains dimmers do not always cooperate, so check what the driver supports before buying; the failure modes are in dimmer compatibility with LED.
The rest of the kitchen
Under-cabinet lighting is a task layer and does not count toward the room's general lighting. Work that out separately from how many lumens a kitchen needs, or get the figure for your dimensions from the kitchen lighting calculator.
Sizing the driver, not just the strip
LED strip runs on low voltage, and the power supply is where most under-cabinet installations go wrong. Three numbers decide it.
Total wattage. Strip is sold by watts per metre or per foot. Multiply by the length and that is your load — a 6 ft run of 4.5 W/ft strip is 27 W.
Headroom. Size the driver at roughly 80% of its rated output, so a 27 W load wants a 36 W or 40 W driver rather than a 30 W one. A supply running at its limit runs hot, and heat is what kills it.
Voltage drop over the run. This is the one that surprises people. A 12 V strip loses voltage along its own length, so the far end of a long run is visibly dimmer than the end nearest the driver. Above roughly 5 metres on 12 V the difference becomes obvious.
Three ways round it: use 24 V strip, which tolerates roughly double the run for the same drop; feed the run from both ends; or split it into two runs each fed separately. Twenty-four volt is usually the simplest answer and costs nothing extra.
Water, steam and the sink
Under-cabinet lighting sits directly above a worktop that gets wet, and beside a sink that produces steam continuously.
IP20 — the default for bare strip and most channels — means protected against fingers and nothing else. Fine along a dry run of cabinets.
IP65 — protected against water jets — is what belongs in the section above or immediately beside a sink, and above a hob where steam and grease both arrive. Silicone-sleeved strip is the usual form.
The failure is slow rather than dramatic: moisture creeps under the adhesive backing, corrodes the copper pads, and segments start dropping out one at a time after a year or two. By then the run is fitted and the cabinets are full.
Grease matters as much as water above a hob. A silicone sleeve wipes clean; a bare strip in an open channel does not, and it dims as it accumulates a film.
Dimming low-voltage strip
Under-cabinet lighting is the run most worth dimming and the one most likely to dim badly, because there are two components in the chain instead of one.
Do not put a mains dimmer in front of an ordinary constant-voltage driver. The driver is not expecting a chopped waveform and the result is flicker, buzz, or a strip that cuts out below half.
Three arrangements that work:
A dimmable driver plus a matching mains dimmer. The driver states which dimmer types it accepts — usually trailing edge. The pairing rules are the same as for bulbs, in dimmer compatibility.
A low-voltage dimmer downstream of the driver, working on the 12 V or 24 V side. Usually a PWM dimmer, often supplied with the strip, and generally the smoothest of the three.
A driver with a built-in dimming input — 0–10 V or DALI. More common in commercial fittings and completely reliable where it exists.
Channel and diffuser are not optional extras
A bare strip screwed to the underside of a cabinet is a row of visible dots, and on a gloss or stone worktop it is a row of visible reflections of dots.
An aluminium channel does two jobs. The diffuser turns the dots into a continuous line — a frosted cover costs a few per cent of the light output and transforms the result. The aluminium conducts heat away from the strip, which materially extends its life; strip run hot on a wooden cabinet underside fades years earlier than the same strip in a channel.
Choose the diffuser by how visible the strip is: frosted for anything in view, clear only where the fitting is fully concealed behind a lip and you want every lumen. And mount the channel at the front edge, for the reasons above — a channel at the back has all the disadvantages of a bare strip at the back, plus the cost of the channel.